


posted on
Android’s perpetual fragmentation issues and the lack of timely updates on fixes have forced many to look for other alternatives to upgrade their smartphone. Thankfully, there are workarounds to get the upgrades to the OS even before they are officially rolled out for your phones make or model.
Rooting your phone and flashing a new recovery file isn’t exactly a cake walk. Finding the right custom recovery file most suitable for your phone and needs could be tricky. Downloading and flashing it also exposes your phone to several risks, one of them being the chances of it getting bricked. Usually, the process takes many hit and trials before it is successful.
But, it’s not all that bad! With apps like Flashify, things become significantly easier. The apps to flash files have evolved over the last few years; but, Flashify stands apart quite apparently for many unique features it offers. Not only can you flash the desired files with incredible ease using this app, you can also integrate it with DropBox for better backup solutions. Let’s give you a briefing on Flashify guide.
Although Flashify was initially designed to work particularly with the Nexus series of phones, it has been successfully used with several other Android smartphones as well. Now, you don’t have to wait for the upgrade to take care of the fixes!
It’s true that there are numerous apps and services that are meant to optimize the performance of your device. However, inarguably, flashing a custom recovery and new ROM still remain to be the most effective way to exploit the maximum potential of any Android phone.
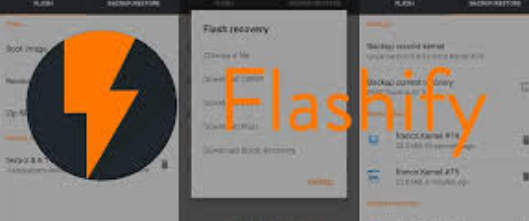
Flashify (for root users) – Get the name correct
One of the most important things is to make sure that you download the right app on your phone. Once you will key in ‘flashify’ in the search box of Google Play Store, many apps with the same name will show up. What you are looking for is the one that is labeled ‘Flashify (for root users.) This is also one of the best root apps for Android.
Once the app has been downloaded and installed it will ask you for the root permission; make sure that you grant it.
In case you need to connect to DropBox
DropBox integration is one of the most awesome features of Flashify, so why not use it? To connect to DropBox, all you need to do is go to the menu and tap the option ‘Connect to DropBox’. Of course, you will need a DropBox account for the same. Also, you must have the DropBox installed on your phone for this to function. With DropBox connected, flashing the boot and recovery files becomes even easier.
There’s one thing you would want to know about the DropBox app though! No denying that it is pretty useful and allows you to access the files from anywhere you want to. However, it takes up the same amount of storage space on your phone as it takes on the online storage. So, if you have a large IMG files, and storage on your phone is limited, delete it after flashing the ROM.
Back up your device first
Whether you are flashing a new boot or recovery, make sure that you have backed up your smartphone first. Once you have granted the root access to the Flashify app, go the menu and select Backup/Restore tab. From there you can choose Backup. Give a name to the backup and also set the destination. Allow the app to backup your phone.
It would be a good idea to back up the kernel too; you can do that using the same steps as stated above. In case you need to restore the kernel that you previously backed up, you will need to find the associated .IMG file. This file can be located by scrolling down on the Backup/Restore screen. The backup files are usually small and it takes only a little time to restore.
Using Flash to Install Custom Recovery
First of all, you will need to download the recovery file you wish to flash to your device. There isn’t one specific file we could point at for you. You will need to do some research of your own to find the file that meets your specific requirements. The good news is that the custom recovery files are easily available on the internet. A simple Google search could get you what you need. Just make sure that you download it from a trusted source lest it sneak in a malicious file to your phone.
In case the DropBox integration doesn’t interest you much, save the recovery file on the SD card to avoid cramming your internal storage. Now follow these simple steps:
- Launch the app; and tap on the Flash tab on the left
- Tap on the Zip File option and choose the Zip file you have saved on your phone; Choose Boot Image if you have saved the .img format on the phone; for custom recovery, choose the Recovery Image option to open the img file for custom recovery
- You will now be required to choose the file saved on your phone
- Now, flash the chosen file onto your device. You will need for a while before the flash is finished.
- You will now need to tap on ‘Recovery’ to pick the desired recovery and install it on your Android smartphone
Rebooting your phone
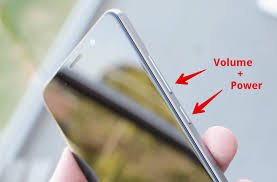
Flashify offers you three different reboot choices, namely:
- Reboot
- Reboot recovery
- Reboot Bootloader
For now, you simply need to use the first option, Reboot. However, the other options come in handy when you need to reboot your Android phone for special purposes.
We hope you would have found this tutorial on Flashify guide worth it. For more updates keep signing back.

 (Updated 2020)")

")