


Rooting is to Android what jailbreaking is to iOS devices. It allows you access to the core of the firmware and gives you greater control over your device. Rooting lets you install third-party apps, remove the unnecessary apps that keep running in the background for no reason, remove adware, and more.
It is also the means to install the custom Android OS on your device. Many users root to enhance the device performance and also to alter the clock speed of the processor. Let’s learn how to root the Android device. The methods we have listed below work for most Android devices.
Backup Your Device
Rooting doesn’t usually harm the data saved on your device. However, there are chances things may go wrong and you may end up losing the valuable data. It is better to be safe than regret later. If you are new to rooting, the risks could be higher. A single wrong step could turn your device into a brick. That’s why backing up the device is a good idea.
Backing up is easy; just make sure your Android device is connected to the internet (preferably Wi-Fi). Here is how you can do that:
- Open Settings app on Android
- Select Personal
- Select Backup & Reset
- Tap ‘Backup my data’
- Select the Google account to which you wish to backup the data
Backup may take a while depending on your last backup and size of data to be backed up.
The above steps may vary across Android devices. But, all you need to do is find the Backup option in the Settings app.
Method 1: Using Your Android Phone (No Computer)
You don’t always need to connect your Android to a computer to root it. There are some apps that let you root the device quickly. In fact, it takes only a single tap to get the root access on your Android device.
However, you will first need to install a rooting app on your device and this part may not be as easy as you would like. The rooting programs are not available on Google Play Store (as you may have already guessed) for they do something that Google does not really recommend. Rooting the device may, in fact, cause you to lose the warranty in certain cases. But, from the legal standpoint, you are not doing anything unlawful. You have bought the device, you own it and you are within your rights to gain root access to it.
Let’s come back to the part where we talk about getting the rooting app on your Android. There are plenty of rooting apps out there and they are all free of cost. KingoRoot and Framaroot are the two most popular and trusted rooting utilities among all.
The installation process of these apps isn’t exactly straightforward. But, it’s not very difficult either. What you need to do is get the APK file on your device. You can run that APK file and install the rooting application. We will consider KingoRoot in this article henceforth. Here are the installation steps:
- Open a mobile browser (like Chrome) on your Android
- Visit https://root-apk.kingoapp.com/kingoroot-download.htm
- Save the APK file on your device storage
- Now go to Security option in the ‘Settings’ app on your Android
- Enable or check Unknown Sources. You need to turn this option on because we are side-loading KingoRoot from a third-party source. Android blocks third-party downloads and installation for security purposes
- Now navigate to the folder on your device where the APK file is saved. You could use Explorer or File Manager app to go to APK folder (or Downloads folder)
- Run the APK file and allow the installation to complete
How to Root Using the App?
Well, now that you have installed the app, rooting should be an easy job. All you need to do is launch the app and select ‘One Click Root.’ You should have a rooted device in less than a minute.
Sounds too easy to be true! Isn’t it? So, what’s the catch?
If truth be told, there is no catch. KingoRoot is a pretty safe app and does not sneak in any kind of virus or malware onto your device. But, the problem is that this method may not work with all the devices. Also, it is more like a trial and error method. On most devices, it doesn’t work the first time. In fact, it could be several attempts before your device is rooted.
This problem isn’t unique to KingoRoot. Even if you are using Framaroot or any other such application, you will have to wait for the moment when you get lucky. So, in essence, it is not really a ‘One Click Root.’
That’s probably the only drawback of this rooting method. If you have all the time in the world and patience is one of the virtues you possess, you would like this method.
Method 2: Using Your Computer
If you have not been able to gain the root access to your Android, you could try this method instead. In fact, there are better chances of success using your computer than using a mobile app. Especially if you are using a high-end Android device with more security patches, using the desktop version of the rooting app could be a better idea.
The first thing you need to do is visit KingoRoot site and download the Windows version of the application from https://www.kingoapp.com/android-root/download.htm
Download and run the KingoRoot.exe portable application to install this rooting app. This Windows app does try to install some additional app but not without taking your consent. If you don’t want to install any concomitant programs, such as ‘Yahoo powered Chromium browser’ (now whatever that is), make sure you uncheck the option at the time of installation and click ‘Decline.’
If you are very confident about the application, scan KingoRoot.exe with your antivirus software (we are certain you will find nothing).
The next thing you must do is turn on the USB Debugging mode on your Android device. The steps to turn this feature on may vary across Android versions. But, typically you need to open the Settings app on your Android and locate the ‘Developer’ options. Select this option and you should be able to see the option to turn USB Debugging on. In some phones, you may need to enable Developers mode before you can turn debugging on.
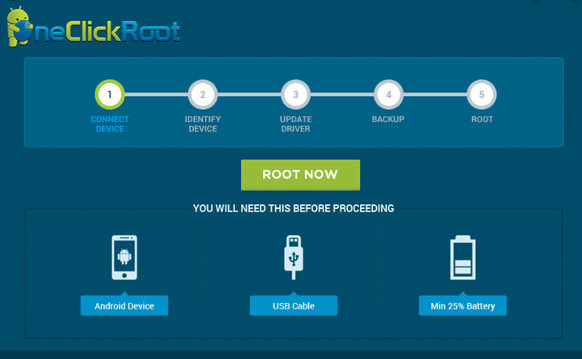
Rooting the Device: It looks like we are all set to root Android device using the computer and rooting application. Run the KingoRoot application on your computer. Now, connect the Android device to the PC using a USB cable.
Within a few seconds, your computer will detect the device and establish the connection. You may see the message on your Android saying ‘Allow USB debugging?’ If this appears, simply tap the option ‘Always allow from this computer’ followed by pressing ‘OK.’
Now you simply need to follow the onscreen instructions to complete the rooting process. This rooting process takes a few minutes.
We are not saying that this method is hundred percent foolproof but it is more reliable than the first method. It has higher chances of success.

 (Updated 2020)")

")