


Apple’s iMessage for Windows is a much-queried subject in this part of the internet. Everyone seems to agree Apple’s messaging service is as quite interesting as its music producing app Garageband. The problem is no one seems to know how to get it on PC. Here you will find how to send iMessage from PC with the help of desktop version. Check out the full article, you will learn how can you get iMessage on PC. Here, you can also get step by step guide on how to send iMessage from computer.
Method 1: Using Chrome Remote Desktop
In this method, we will learn how to access iMessage through Chrome Remote Desktop extension. This is not exactly a workaround but a systematic way to use iMessage on Windows. Chrome Remote Desktop extension lets you access the screen of any other computer remotely.
If you have a Mac computer and you wish to access iMessage installed on it from a PC, Chrome Remote Desktop will let you gain access to Mac screen. Yes, you do need a Mac computer for this method. You will also need to make sure that your Mac is turned ON during remote access.
Please note that both the computers must be connected to the internet for remote access. We recommend Wi-Fi for a better experience.
Here is how you can access iMessage for Windows using Chrome Remote Desktop:
Step 1: First of all, download Google Chrome browser from the official website on both the computers (PC and Mac). You can download Chrome from this link
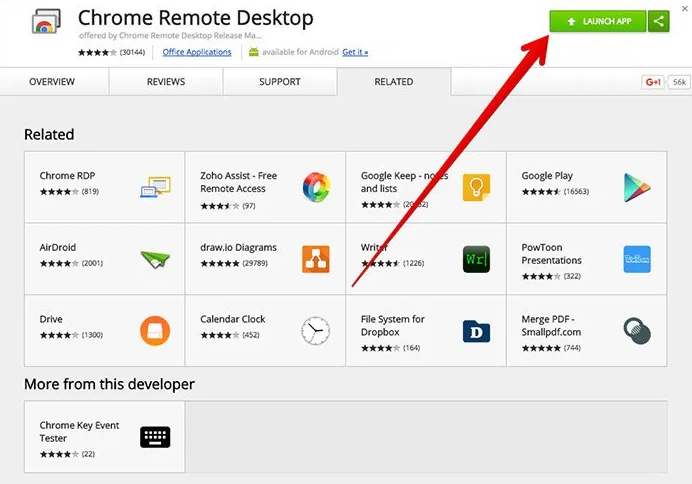
Step 2: Install Chrome Remote Desktop extension on both computers from here
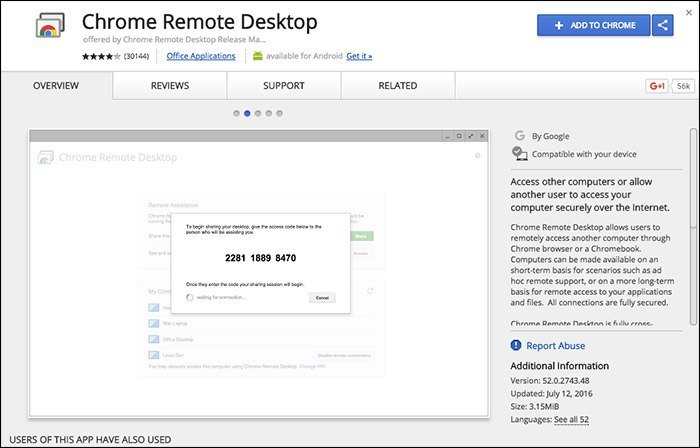
Step 3: Once the extension is installed, click ‘Launch App’ button on the top right.
Step 4: We will need to install an additional program on the Mac computer called ‘Chrome Remote Desktop Host Installer.’
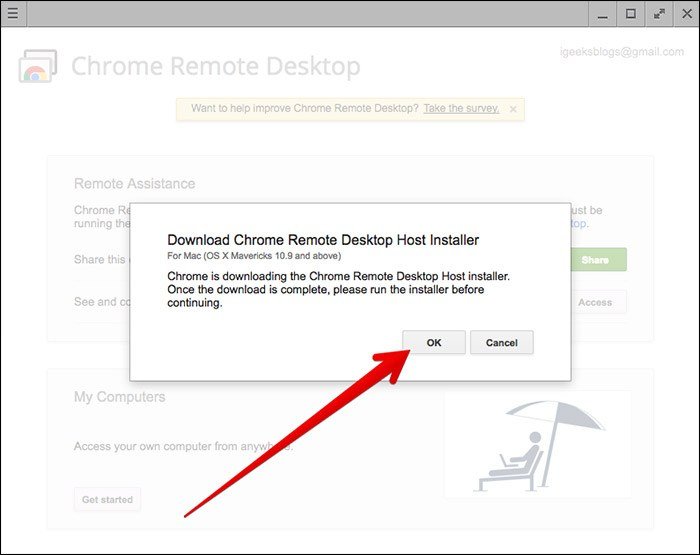
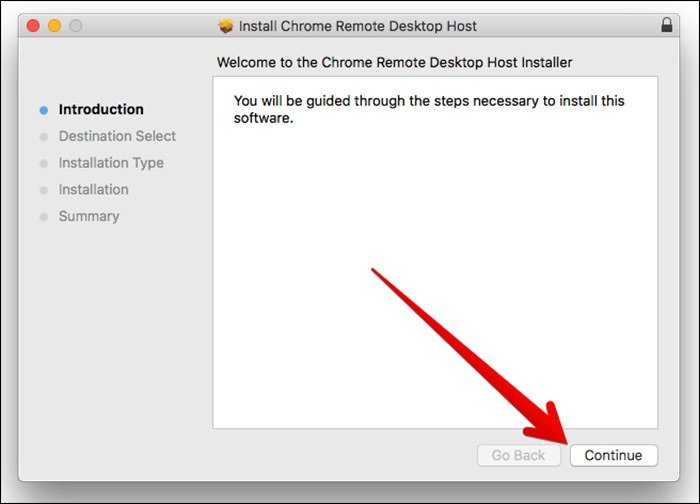
Step 5: Locate the Host Installer file on your Mac’s hard drive and run it to install it.
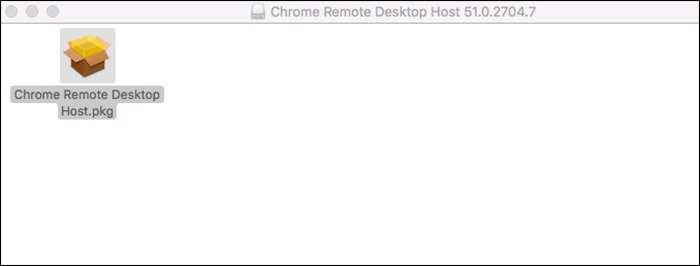
Step 6: Follow the onscreen instructions to install the application. You may be required to enter your Mac computer password during the installation
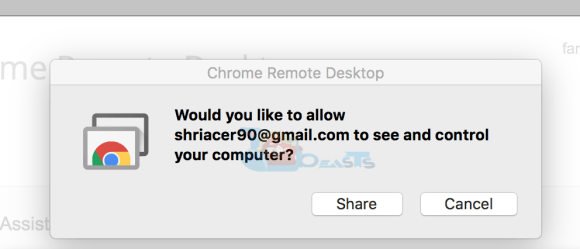
Step 7: Now launch Chrome Remote Desktop on your Mac. You will see a 12 digit code on the screen. Note it down. This is the code you will enter on the Chrome on PC to gain access to your Mac computer remotely. Please be careful about who you share the code with. Anyone with the code will have access to your Mac.
Step 8: Now launch Chrome Remote Desktop on your Windows PC and enter the 12-digit code. You will now have remote access to the Mac computer.
Step 9: Now you can go to the app drawer and access iMessage
This is all you need to do. Again, please remember that you need to have a Mac computer for this process. It must be turned ON and connected to the internet for remote access.
But, what if you do not have Mac or iOS? Is there still a way to get iMessage for PC? Well, thankfully there is and that’s exactly what we are going to discuss in the following text. Keep reading!
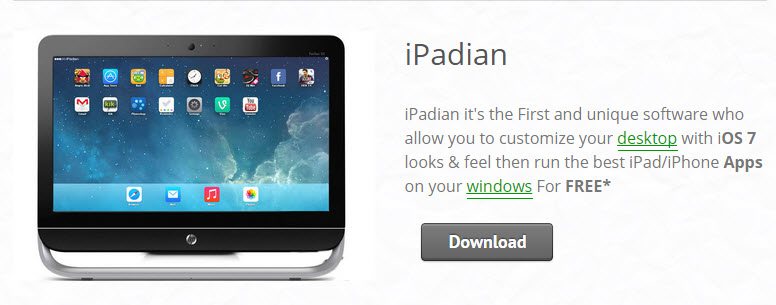
Method 2: Using IPADIAN Emulator (MAC Not Required)
iPadian is an iOS emulator for Windows. As the name suggests, an emulator is an application which emulates the iOS environment on your PC. This allows you access to the vast iOS ecosystem right from your computer. Isn’t this incredible? While there are many emulators you may find on the web, iPadian is what we have trusted and found reliable for quite a while now. It is easy to use, lightweight and more stable than the others.
Here is how you can use iMessage using iPadian:
Step 1: Visit https://ipadian.en.softonic.com/ and download iPadian installer
Step 2: Now run the .exe installer file to install iPadian
Step 3: Once installed, run the iPadian emulator on your PC
Step 4: Sign in with your Apple ID and password if you already have one. If you don’t have Apple login credentials, create new.
Step 5: You now have access to the iOS ecosystem from Windows. In fact, iPadian interface looks like the interface of an iPad (hence the name iPadian)
Step 6: Look up for iMessage in the apps and launch it
This is all you need to do to get iMessage running on your Windows using an iPadian emulator.
Every time you wish to use iMessage, just run iPadian. In fact, you can access all the iOS apps from your computer now.
You May Also Like: How To Download Garageband For PC
Method 3: Download iMessage for Windows Using Bluestacks
iMessage is an instant messaging application by Apple, allowing you to chat with anyone having an iPhone or iTab. Being exclusive to iOS, it’s a widespread belief that it cannot be downloaded for PC. Guess, you’ve been wronged all this while.
iMessage for PC download is possible, just that you need to have a perfect resource to get it done. This post encompasses all the details about iMessage for Windows Download, making it a no-big-deal for you to install it on your PC.
Steps To Get iMessage on Windows System:-
1. First off all download Bluestacks Android emulator from the given link.
2. Install Bluestaks just like you install other softwares.
3. Search iMessage in the search bar.
4. Download the iMessage App setup it and you are done.
Whenever you wish to message your friends, simply run Bluestacks on your PC, launch iMessage and chat your woes and worries away
Recommended: iMessage Online For PC & Mac
Also Read: 8 iMessage Apps Which Have Ruined The Service For Eternity!
New Update –
Now you can use iMessage on Android devices using a 3rd party app named, “PieMessage”. Eric Chee published a new project on GitHub, here is the link
Check out The Awesomeness of iMessage on iPhone X or any other iOS 11 device
With the arrival of iOS 11 on Apple devices, the face of iMessage app has improved immensely, now there are plenty of new features in iMessage that makes it one of the most sought-after apps for the users. The features are so vast that they cannot be explained in words and requires the visual appraisal to appreciate this beauty of this wonderful app. Here is a must watch video for your reference to understand what iMessage brings to the iPhone X or any other iOS 11 devices.
How to Disable iMessage or Deactivate iMessage Before Switching to Android
If you are making a switch from iPhone to Android, you would like to disable or turn off iMessage service. When you leave it ON, the service remains active even if the device is not. Your iMessage contacts may remain under the impression that you are still using the service. Thus, they may continue sending iMessages to you without getting any reply. You may disable iMessage even after switching devices. But, it is so much easier if you do it before migrating to Android.
How to disable iMessage on your iOS Device
If you still have access to your iDevice, here is how you can disable iMessage and Facetime:
- Open Settings app (gear icon) from your iOS home screen
- Select Messages
- Move the iMessage toggle right to disable the service
- Open Settings again
- Select Facetime this time
- Turn it off by moving the toggle to right
Already Started Using Android?
In case you have already made the switch to Android, you can still turn iMessage off. Here is what you need to do:
- Visit the link http://selfsolve.apple.com/deregister-imessage on your mobile or computer
- Scroll down to the section “No longer have your iPhone?”
- Enter the phone number for which you wish to turn iMessage OFF (you need to have the same number active on any other device)
- Press ‘Send Code’ button
- The code will be sent to the phone number. Enter the code on the website.
- You will receive a confirmation that iMessage has been deactivated
This is all you need to do to disable iMessage.

 (Updated 2020)")

")